I had a few shoots lined up last summer that I felt would benefit from a splash-proof camera housing or underwater camera housing, but budgets on those shoots just wouldn’t allow for a complete underwater system, and quite frankly, those were probably overkill anyways. I needed something that could shoot split-level photos (above and below water) and I could take out on a paddle board, and not be scared of falling into the lake. A full underwater system retails for $2000+ and around here in Toronto, the local rental houses don’t stock underwater gear (although one of the kind folks at Aquatica in Montreal was willing to rent me his personal housing, but it would have still been over budget). The next option was to look at the EWA-Marine bags. At $350+ the pricing was much more reasonable, but their flat front lens ports were more in line with true underwater photos rather than the split-level photos I had planned.
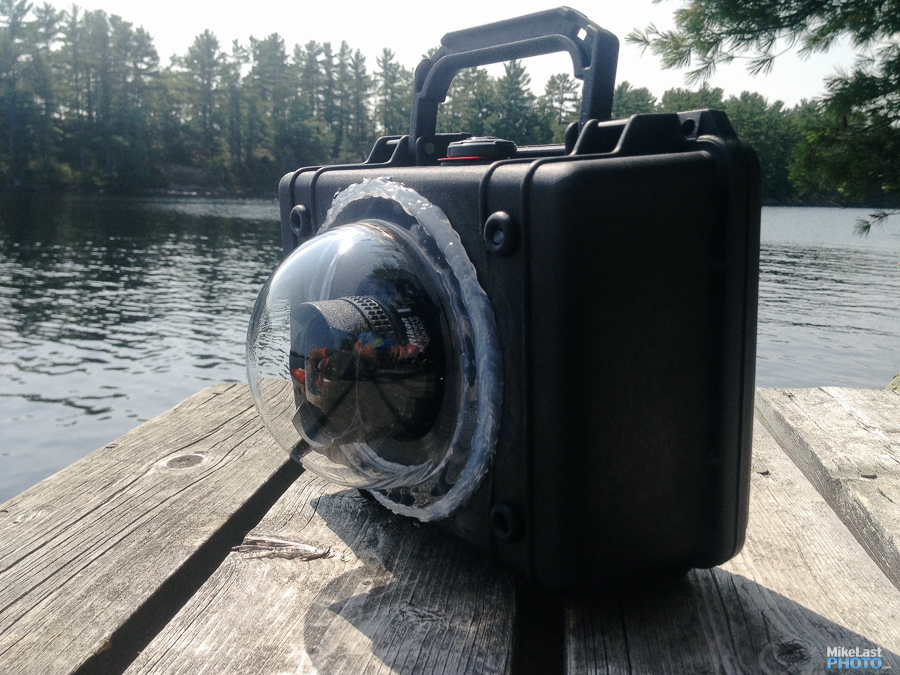
Disclaimer: Before we continue… this housing was designed to be splash-proof. At most, only 50% of the housing is submerged in the water. I have no facts or figures on depth rating of this housing and advise you to make this housing at your own risk. It is no substitute for a true housing, such as those from Aquatech, Ikelite, Nauticam or Aquatica. If you decide to build this, you do so at your own risk.
Time for some DIY. I found one or two projects online where people had done this before, but with a flat port on the front rather than a dome port. I decided to document the build process with as much detail as I could pull together.
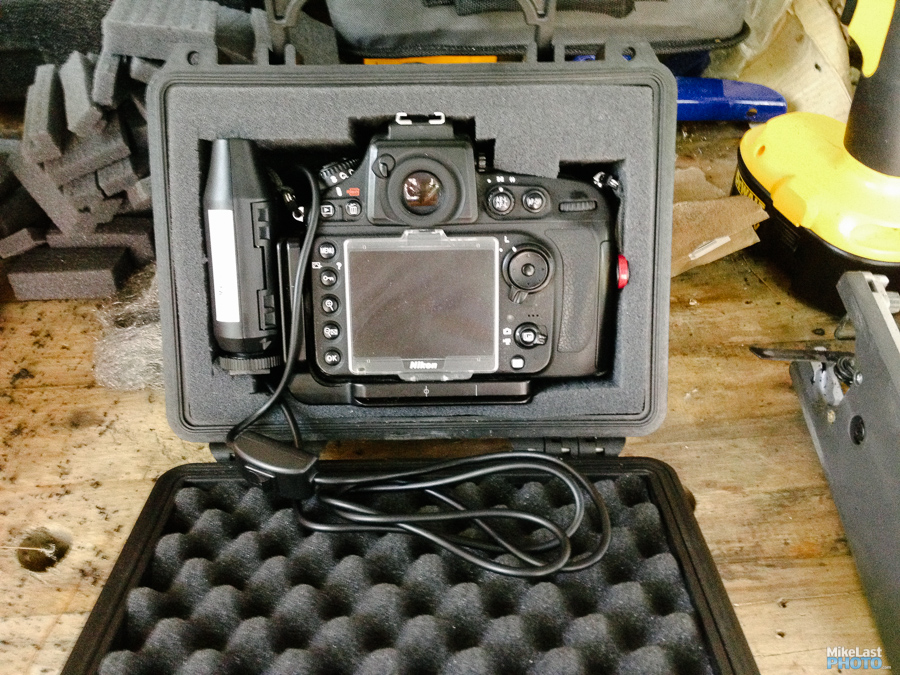
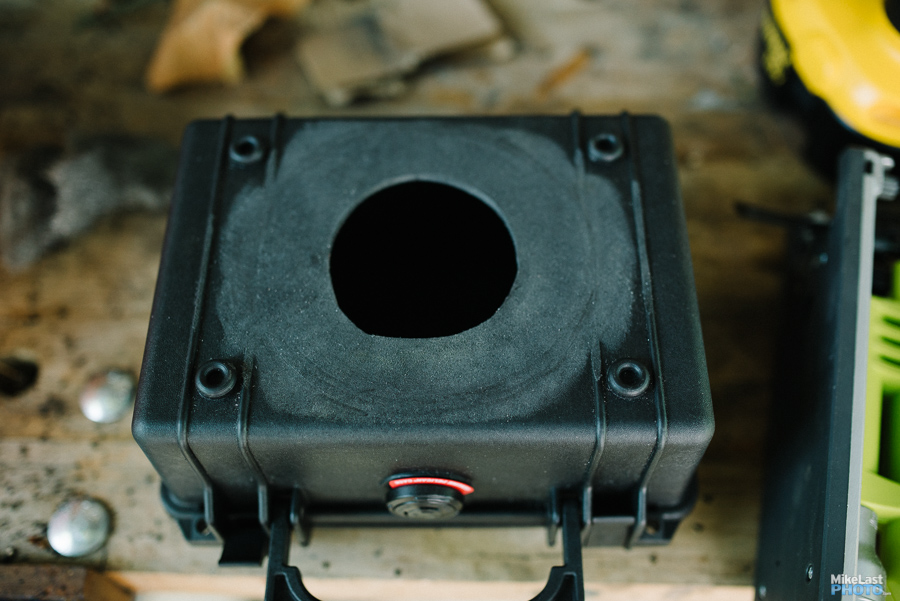
Pelican Cases are a great place to start, as they are built to be waterproof containers for camera gear from the very beginning. For this project, we would need to fit the Nikon D800, Nikon 16mm Fisheye and a Pocket Wizard Plus 3 inside the housing. After looking through the dimensions and laying everything out, the Pelican 1150 would be the case of choice.
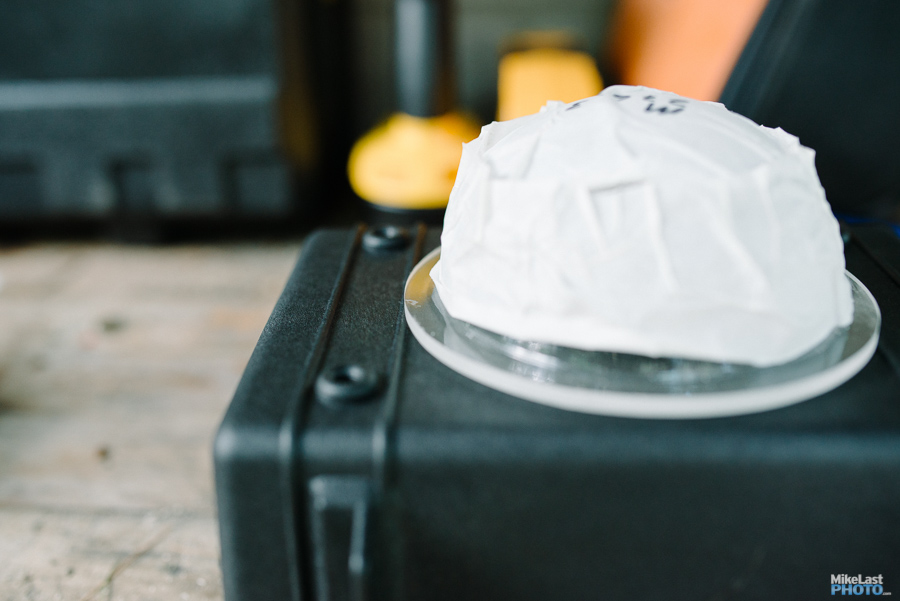
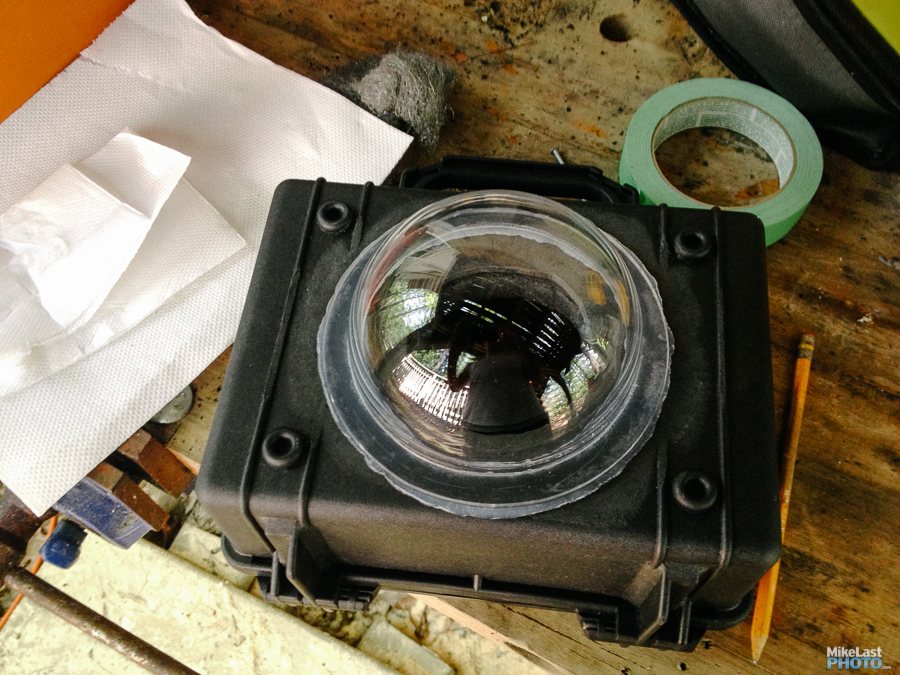
Next up, we need a Lexan or Polycarbonate dome to push the water line out in front of the fisheye lens, and really give that effect that you are at the water line. I looked up a few companies online and eventually found the good people at EZ Tops Worldwide. Unfortunately they are a small shop and everything is made custom, so expect at least two weeks for production plus an additional week for shipping. I decided on a 3/16-inch Acrylic dome, with a 4.5in diameter (as the Pelican 1150 only has 6in of surface area), 2.5in depth and a 1/2-in flange for secure mounting. The dome itself was only $33.90, but for some reason they charge $30.00 shipping to Canada.
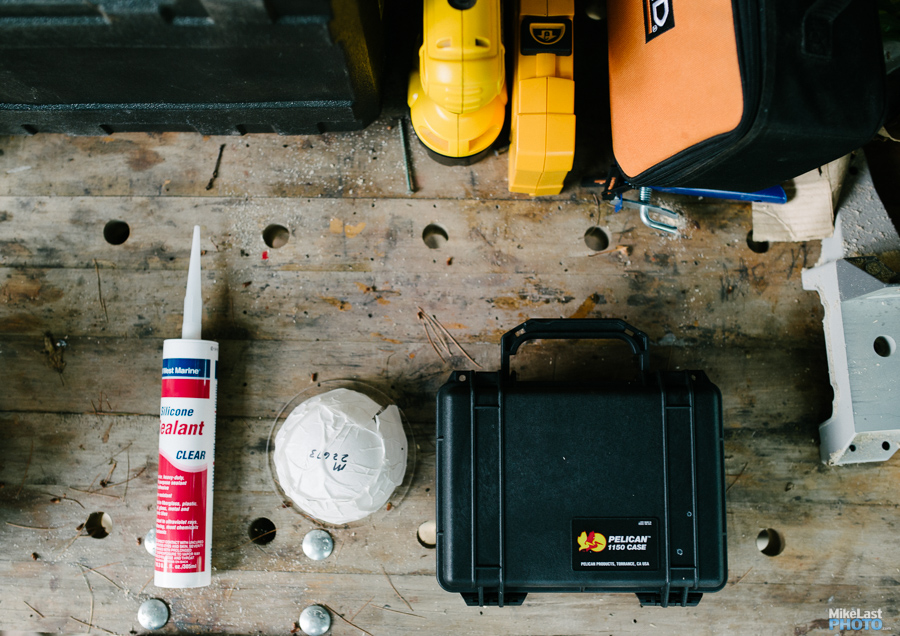
Finally was the adhesive. I looked at a few options and read through a bunch of forums, ending up on West Marine’s Clear Silicone Marine Sealant.
Total Parts Cost:
$63.85 – Acrylic Dome shipped from EZ Tops Worldwide
$60.83 – Pelican 1150 shipped from Custom Case Co.
$18.99 – West Marine Clear Silicone Sealant
$143.67 Total including Taxes and Shipping.
With the shopping list secured, it was time to build.
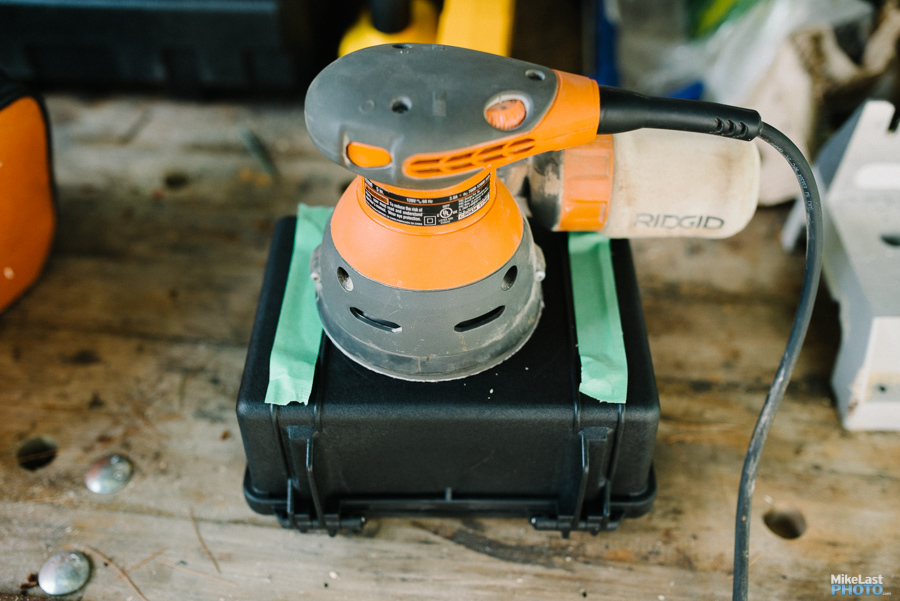
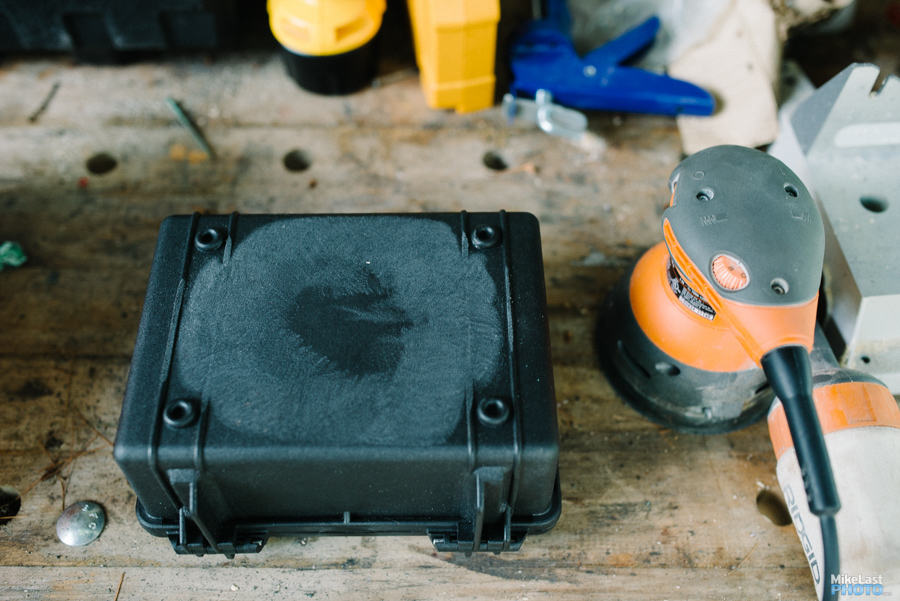
As I started to lay out the dome on the Pelican 1150, I realized there are structural ridges on the case that would need to be removed to ensure a secure adhesion all the way around the dome. A palm sander made quick work of those.
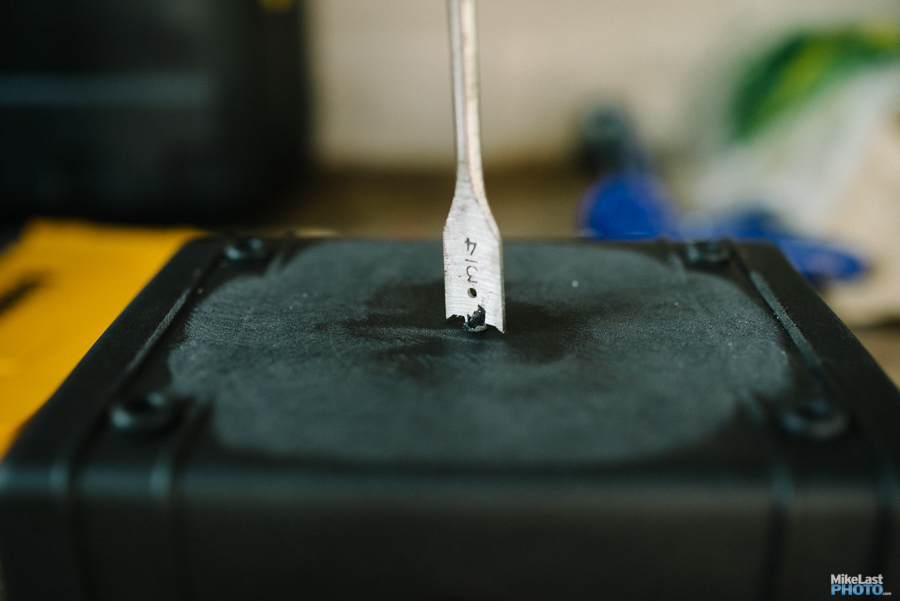
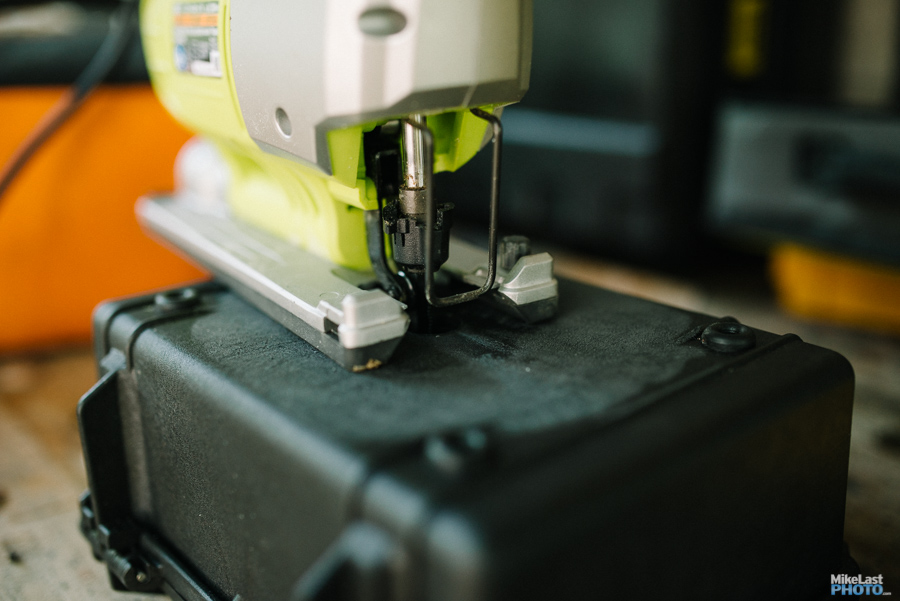
Next up was to create an opening in the Pelican case for the lens to get through. I measured the lens diameter, sized the camera inside the case for fit to ensure that the lens would be in the middle of the opening, and went to work with the jigsaw.
Finally, I laid down a very thick bead of the West Marine Silicone Sealant and bedded the 1/2-in flange of the acrylic dome into it. I put a second bead of silicone around the outer edge of the flange to help ensure it was water tight. I left it for 24 hours to cure.
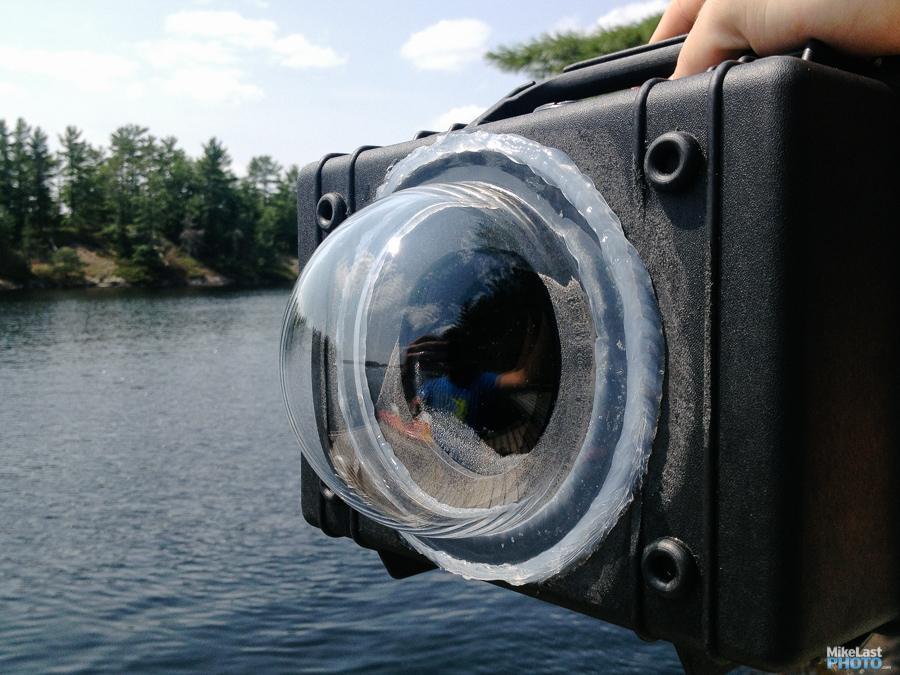
Finally, an empty dunk test in the lake for 10 minutes after the cure time. Inspection showed everything was dry inside, and I was comfortable putting my camera inside.
How It Works and Some Limitations
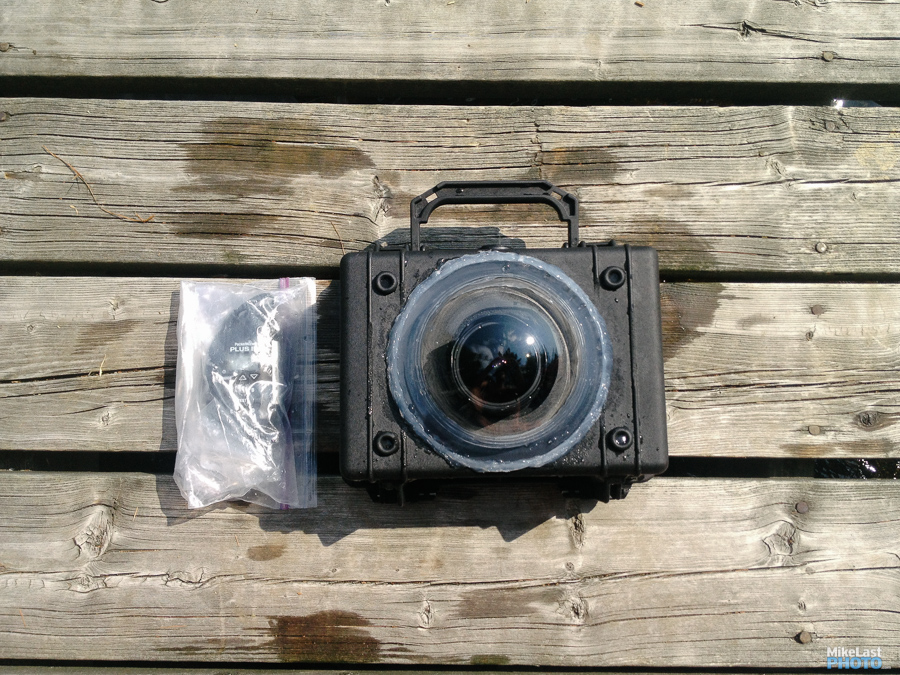
The housing uses the Pocket Wizard Plus 3 remote triggers to release the shutter. A pre-release cord to Nikon 10-pin runs into the camera. I keep the double-Ziploc bagged Pocket Wizard in my swim trunk pockets and press the Test button to shoot a photo.
One of the limitations of this system is not being able to see exactly what you’re getting. I am able to overcome this with the Eye-Fi card sending JPEG previews to my iPhone.
Another issue is not being able to adjust your camera once it is inside the housing. As I normally shoot on aperture priority, this isn’t a huge issue. I generally set the camera to F6.3 and ISO 400 before packaging everything up.
The final limitation is autofocus. Because of the rounded port, the fisheye lens will occasionally try to focus on the water in front of the port, rather than the true subject. As the true subject is always likely to be at the hyperfocal distance, I just set the lens to hyperfocal and leave the camera on manual focus.
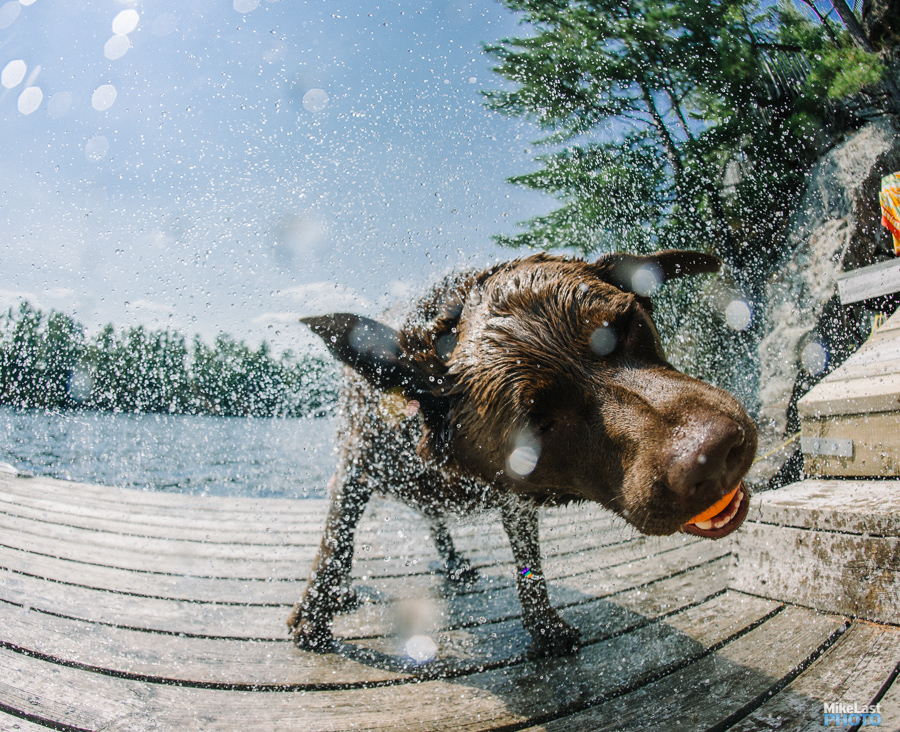
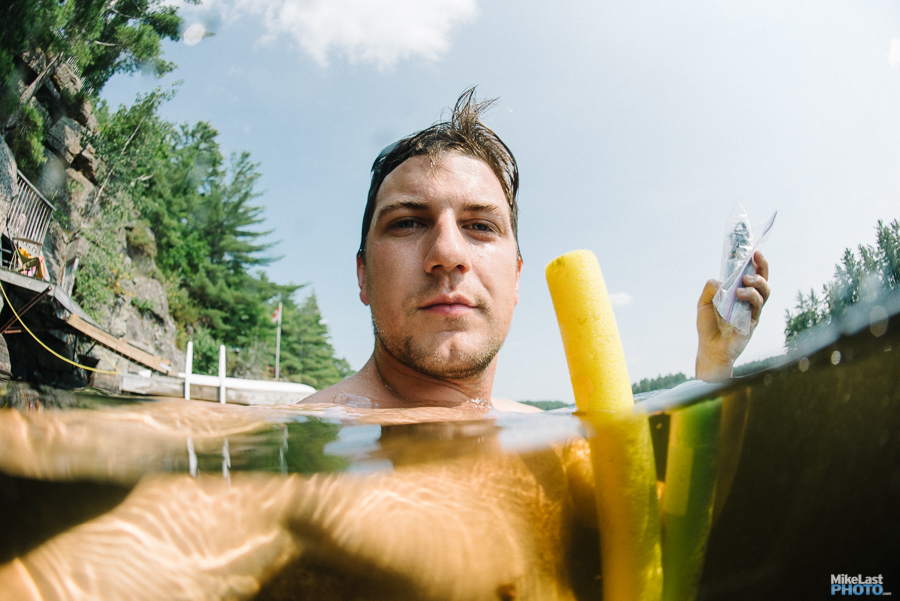
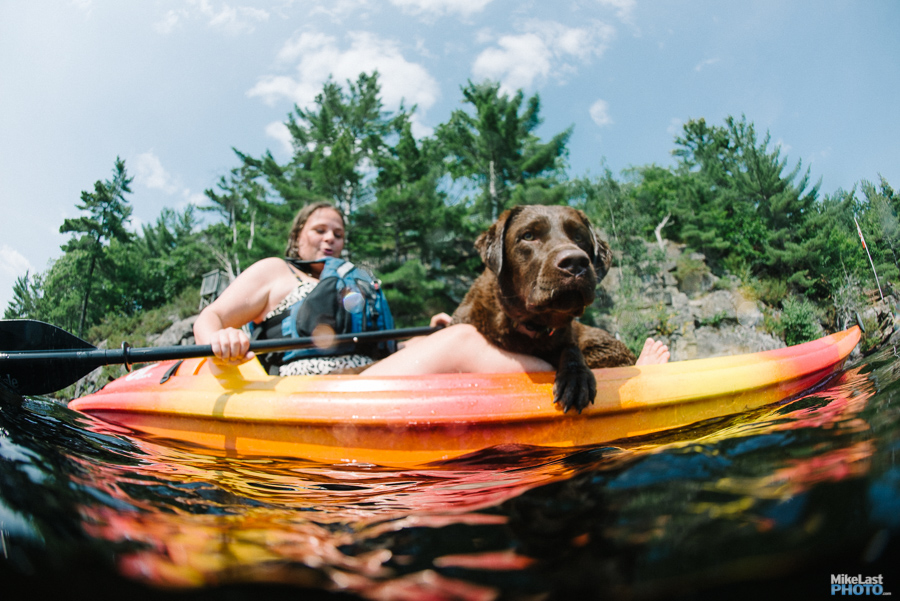
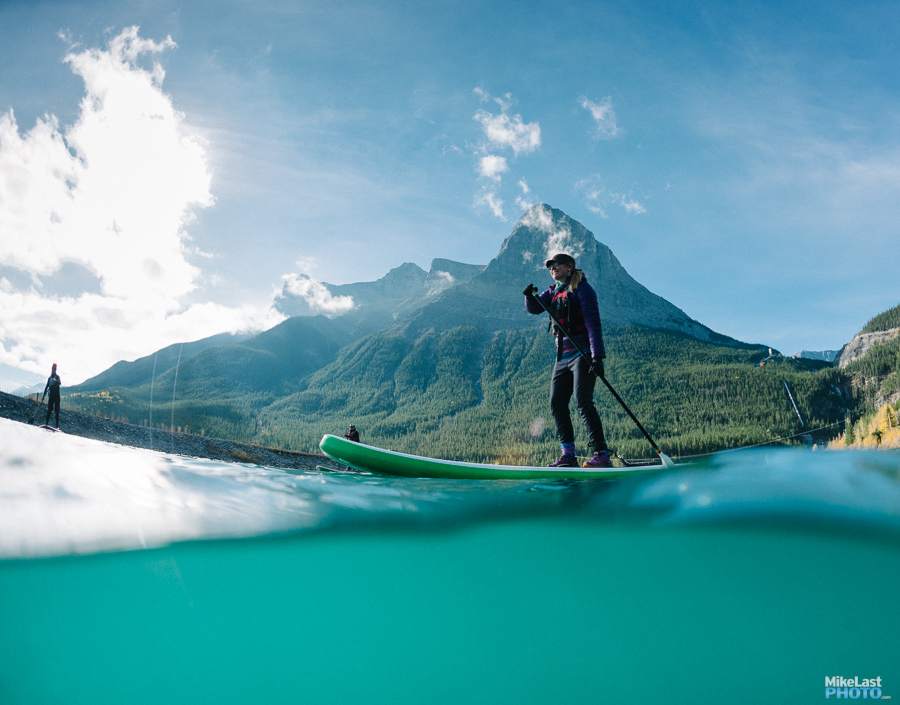
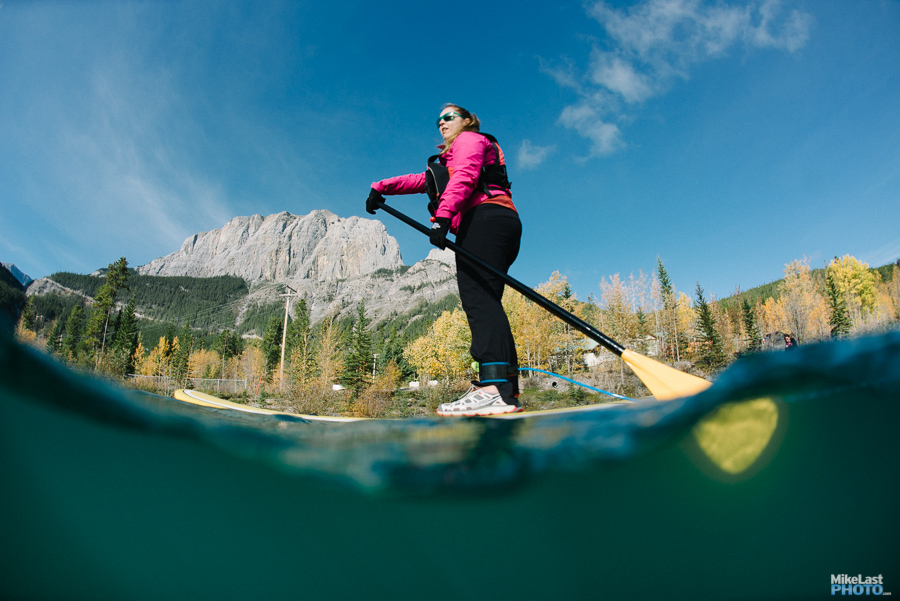
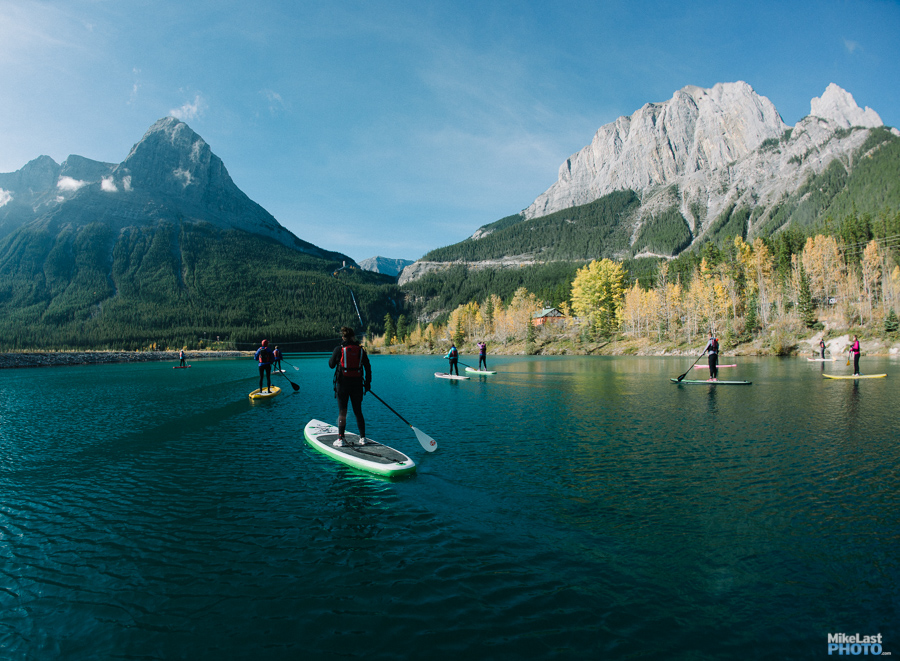
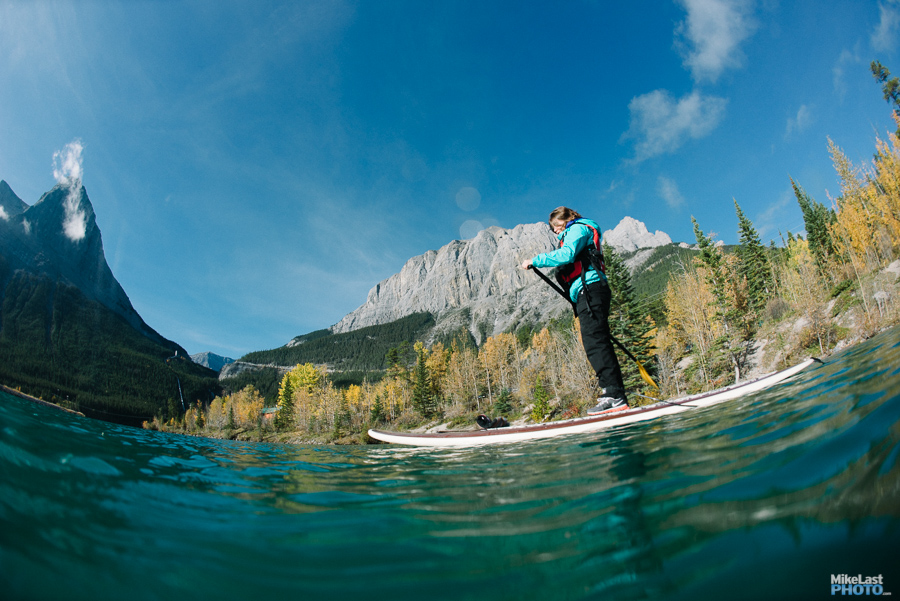
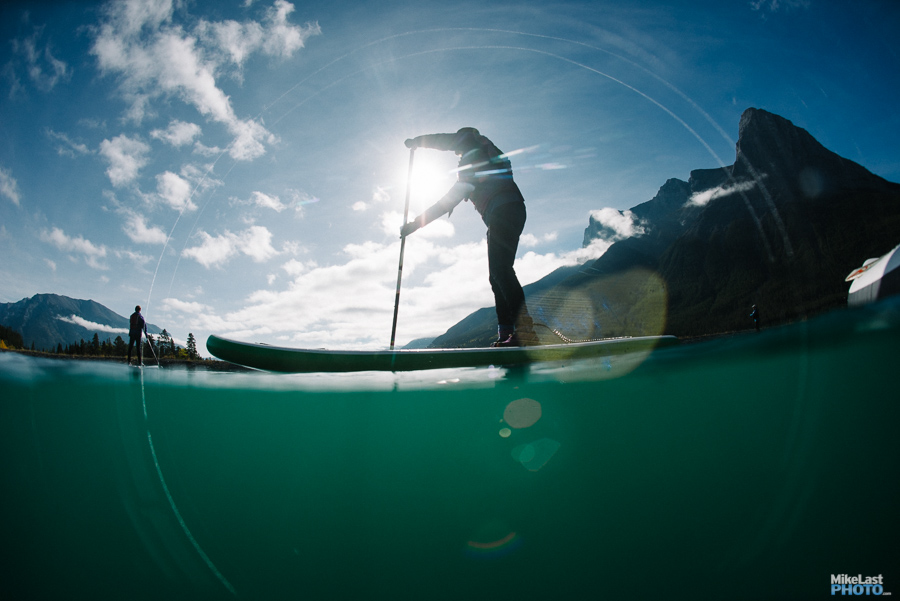
Examples


This is a great article! I’ve been searching high and low for a company that can provide dome port material at a reasonable price build out some camera traps. Thanks for the thorough article! Very, very helpful.
I decided on a 3/16-inch Acrylic dome, with a 4.5in diameter (as the Pelican 1150 only has 6in of surface area), 2.5in depth and a 1/2-in flange for secure mounting.
Want to do this! What is the dome size? I already have this exact Pelican case.